An Engearment Guide
Bikeacking Gear Guide
How To Get Started Bikepacking – Incredible Mobile Adventure
Drew Thayer goes over how to start bikepacking. He and his wife test out some gear and show you how they set up their kit for mobile adventure!
Bikepacking is a fun pastime that’s gaining popularity. While heading off into the hills on a bike is not a novel idea, an emerging niche industry is making it possible to strap everything you need for multi-day backpacking to a fully featured mountain bike (even full-suspension!).
While the concept of bikepacking is simple – part of its appeal – to carry all your equipment on a FUN mountain bike is a bit gear-intensive. You can strap almost any combination of bags to a road bike with a large front and rear racks, but if your goal is to climb some sustained, rooted-up mountain trails and slay some flowy singletrack, you need to be able to secure your gear to your bicycle in tightly-strapped, low-profile bags that keep the weight centered on the frame so you can maneuver.
The two main limiting factors with bikepacking gear are space and security. Let’s look at each.
Saving space:
For a fun ride, the capacity of your bike to hold gear is pretty space-limited. Most people will want to bring less gear than they would for regular backpacking – think ‘ultra-light’ here. To feel good on singletrack, all your kit needs to fit in a handlebar bag, an under-seat bag, perhaps a frame bag, and a small backpack.
The handlebar bag is the largest, and a typical 20-degree sleeping bag will take up half of that. The next largest items are probably tent, then stove, then sleeping pad. I pack my bike with the basic principle of putting the largest items wherever they fit, packing the densest items onto to the frame bag where the weight doesn’t affect maneuverability, and keeping my backpack as light as possible.
Securely attaching to the frame:
It’s much harder, and much less fun, to ride singletrack with bags of gear flopping around off your bicycle – it’s worth investing in some bags from a bikepacking-specific brand. These bags are engineered to carry the weight and keep it lashed as tightly as possible to your frame.
They can be pricey, so if you’re just starting out, I’d recommend starting with a good seat bag, followed by a handlebar bag, and a frame bag after that. Get 3-4 voile straps (the orange rubber straps skiers use)… they’re cheap and indespensible.
Packing your rig
Here’s how I pack my bike for a 3-day bike trek in the mountains above Crested Butte, Colorado in August. The day temps might reach 80, the nights will drop near freezing, and it will likely rain at some point.
On the handlebars:
The handlebars are for lighter, bulkier gear. The old-school DIY move was to just shove your clothes and sleeping bag in waterproof stuff-sack and strap it to the handlebars with cord, voile straps, (duct tape?)…works but takes precise strapping skills to avoid losing your kit on a fast trail. There are some great bikepack-specific products out now that make this enterprise much less sketchy, at a few price points. Here are some examples.
Revelate Designs Sweetroll handlebar bag ($99 – $110)
This is an ace at holding lots of gear in a waterproof bag that cinches tight to the bike. It holds my sleeping bag, part of my tent, and extra clothing like socks and long johns. It’s a super tough waterproof bag with two roll-top openings and secures really well to the frame; I can ride flowy singletrack and barely notice it’s there. It also has an external flap where I shove quick-access things – raincoat and map. This is the Cadillac option – bomber and well designed, and worth the money if you’re going to do this often, or go on a long trip where rain is likely.

A great cheaper option – halfway to do-it-yourself – is the Front End Loader handlebar gear mount ($50). Made by Oveja Negra in Salida, CO (an awesome small company!), this is really clever – it’s simply a semi-rigid panel with straps on one side to secure to the handlebars and straps on the other side to hold a bag – any bag that’s big enough to fit. Sea-to-summit lightweight dry sacks work really well in sizes 13 and 20 liters ($23-$26, too small does not work). https://seatosummitusa.com/collections/gifts-under-25/products/lightweight-dry-sack?variant=7896140513308

What about keeping some munchies handy on the trail? Oveja Negra sells a really handy Lunchbox accessory bag that straps to handlebars as well. It’s big enough to hold a light raincoat, snacks, and a phone, and is made with waterproof material and a burly zipper so it can hold up to rain. It can be used alone, OR it can ride on top of that stuff sack you strapped to the Front End Loader. Used together, these create a really useful handlebar carrying system where bulky gear rides in a stuff sack and you can reach into the Lunchbox anytime for a headlamp, bug spray, phone, or, well, lunch.
Under the seat:
If you’re going to invest in a top-quality bag, this is where to put your money. Some seat bags flop around a lot, and you feel that weight on every bump and turn. My Oveja Negra Gearjammer bag really limits this ‘swing weight’, while still holding quite a bit: puffy jacket and the rest of the tent, some layers, maybe my sandals and a book, or my fishing reel and flies.
On the frame:
Ideally this is where you put the densest items, because you’ll notice the weight least here. Anything metal (bike tool, knife), heavy food (cheese, sausage), and water purification go here. If you have a hard-tail bike go for a full-triangle frame bag; you won’t regret it. Narrower bags are also available and can hold a lot of food. A Jetboil stove is narrow enough to fit in many frame bags and not impede your pedaling. Full-suspension bikes offer less space, but a variety of small top-tube bags can hold some dense items (Salsa and Blackburn make good ones). I shove my sleeping pad in a water-bottle cage and secure it with a voile strap.
On your back:
Go as small as possible; your back will thank you if you’re spending long hours in the saddle. I use an old 18 Liter pack to limit what I can put in it. Besides my water bladder, I put light things in here – maybe a headlamp and windbreaker and a few trail snacks.
Gregory Amasa 10 ($100)

My wife really likes this little bag. It comes with a 3 liter hydration bladder that easily stows in its own pocket. The bag has several small pockets which help keep small items like phone, keys, and some bars organized, and it has a stretch panel on the back that you can stuff a windbreaker or raincoat into for quick access. It doesn’t hold a ton of stuff, so may not be the best choice for an all-day hike in cooler weather, but is ideal for warm weather or mountain biking, where you don’t want to carry much on your back anyway – just the essentials.
Bikepacking Gear guide:
Showers Pass Waterproof RainSlinger

If you can get away with it, a fanny pack is even nicer than a backpack – let your whole back breathe! Showers Pass makes a cool fanny pack that is fully rain-proof and is really large for its type; it holds all your tools, spare tube, raincoat, and some snacks. It rides really easily on my back hip and I don’t even notice it’s there. $69

Great lightweight camping gear
Space is at a premium on a bicycle, so gear that’s light and compact makes the riding easier and more enjoyable. Here are some recommendations, in rough order of bang-for-buck in weight savings:
Tent – Big Agnes Fly Creek HV UL2 Bikepack Tent
Big Agnes Fly Creek UL 2 Bikepack: at 2 lb 10 oz (stripped down to 2 lb 2 oz), this is one of the lightest 2-person tents on the market. It feels like it’s made out of a grocery bag – but is totally storm-proof. It’s not roomy; expect to get cozy with your tent-mate if you’re sharing, but they included some large internal pockets that help keep the cramped inside organized and are also useful for airing out and drying your damp shammy (mmm… the realities of bikepacking).
It also has a vestibule, which is large enough to cook under using a low-flame stove like a Jetboil or pocket rocket. Most importantly for bikepacking, this tent is designed to fit on the front of a bike! The poles are super short, the shortest available by far, and fit between the drop bars of a road bike. The whole kit comes with straps to secure it to your bars and head tube in a tough waterproof bag. If you’re riding as two people, one person can just strap this instead of a handlebar bag and ride along. $380 at REI

Sleeping bag – Thermarest Hyperion 32
Bulk matters more here than backpacking, because you don’t want your sleeping bag taking up most of the room in your handlebar bag. For summer use in the Rockies, I’ve been super impressed the Thermarest Hyperion 32 degree sleeping bag – it’s truly warm down to freezing (as long as you layer appropriately within), and it takes up about as much space as my jetboil!
 Hyperion™ 32F/0C Sleeping Bag | Thermarest
Some people may be wary of the 32-degree rating (they also make a 20-degree version), but I sleep cold and have found the lighter bag just fine as long as I wear warm socks, long johns, and lightweight puffy jacket, which I usually do anyway. Why not carry some of that weight in a jacket you can wear around camp? You can’t beat 17.6 oz for a sleeping bag, and you’ll have plenty of room left in your handlebar bag for the rest of your clothing. $380 at REI
Sleeping pad – Big Agnes Insulted AXL Air Sleeping Pad
Pads are really light these days; I’ve tested two that fit inside a water bottle cage. The Exped Synmat Hyperlite (R-value of 3.3) weighs 12.3 oz and is bomb-proof durable, it also doesn’t make the annoying crinkle sounds when you move around at night.
Big Agnes makes an AXL Insulated pad that’s even lighter (10.6-15.9 oz depending on size – comes in Mummy or Regular) and just as warm, but it will creak and crinkle even if you just move your foot – let along a full roll-over. Imagine sleeping on a pile of bubble wrap – crinkle crinkle crinkle. My wife instructed me not to move. That said, if you’re good at sleeping in one position, it’s worth the weight savings. $160 at REI

Stove – Jetboil
I’m a fan of minimalist pocket rocket stoves and a light pot, but for bikepacking I think the Jetboil is the way to go since it can fit between your legs in a frame bag. If you have to bring a pot, you may end up carrying it in your backpack.
Bike clothing for long-distance tours
Insulation
Lightweight puffy – Patagonia Macro Puff Hoody
Alight down jacket is the best choice for drier climates, but for a tour last weekend in Crested Butte with sustained rain in the forecast, I brought Patagonia’s new ‘Macro Puff’ hooded jacket. It’s filled with a ‘pluma fill’ fiber they developed to mimic the spirality and loft of down, but it retains loft really well when wet. Worn over a thin micro-fleece sweater, it was plenty warm for a night spent around 11,500’ with temps down below 40. The sleeves got quite wet during the rain, but the jacket stayed warm and barely lost any loft. $400 at Patagonia
Read our detailed review on the Patagonia Macro Puff Hoody here.

Backcountry.com Silver Fork 750 Hoody
For down jacket at a lower price, Backcountry.com is now branding their own clothing and sell the Silver Fork 750 down jacket. It’s not quite the lightest, but the construction is just as solid as the top-tier clothing companies, and it’s a good bit cheaper, a great value. The fit is a little big – I find the large quite roomy and would fit a medium better. $270 at Backcountry.com

Patagonia Nano Air jacket
My Patagonia Nano-Air jacket travels with me almost everywhere – it’s super versatile, dries quickly, and is warm for its bulk. Notably, it breathes really well, so you can throw it on if you get chilly on a lunch break and need to warm up. It’s synthetic, so if you get caught in a thunderstorm on a high elevation ride you can wear it under a raincoat (or windbreaker if that’s all you have) and stay warm. Mostly, I use this as my go-to light insulation layer for summer bikepacking tours or even long highcountry rides, since this layer takes up little space and has lots of warmth for its weight.
I recently was able to test some bike clothing from Showers Pass, a company from Portland Oregon that makes bike gear to handle rainy climates.
Jacket – Showers Pass IMBA jacket
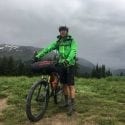
A waterproof 2.5-layer jacket in a nice bright green. It’s durable enough to withstand fast encounters with trailside brush and tree branches but only weighs 16 ounces, about average weight for its style.

It’s not super light, more of a durable, long-lasting option.Will work great for bike commuting too with the really visible green color. Includes ventilation chest zips which are nice when riding uphill. $199
Shorts – Showers Pass Cross Country Shorts
I really like these, they are stretchy and low-profile. A ventilation zipper on each leg makes a difference on hot climbs, and the DWR coating works well – we rode 2 hours of singletrack in a steady rain and my shammy didn’t get wet. $89
https://www.patagonia.com/product/mens-short-sleeved-merino-bike-jersey/23925.html
Shirt – Patagonia Sleeved Merino Bike Jersey
I’ve become a fan of wool for touring, especially in the high country where the rain is cold and often comes unexpectedly. Wool is an amazing fiber – it always seems to keep me at the right temperature, even on a ride that passes through beating sunshine to wind-driven rain. I’ve worn Patagonia’s XX merino wool t-shirt on all my recent riding and always seemed to be comfortable. Wool for the win. $89 at Patagonia
Socks – Showers Pass Lightweight Waterproof Socks
Bona-fide waterproof socks that actually feel pretty normal on your feet. They are bit harder to put on and take off because they don’t stretch like a normal sock, but your feet will be happy if your ride through a rainstorm in these. You can peddle straight through a raging creek – your feet will stay dry. I am sold on these. $37
Drew Thayer




Leave a Reply